Wired Elevator Tutorial
This tutorial explains how you can create a simple elevator using wired for your room.
2x WIRED Effect: Match Furni to Position & State
1x WIRED Add-on: Unseen Effect
1x WIRED Add-on: Movement Physics
1x WIRED Add-on: Movement Physics
1x WIRED Add-on: Animation Time
3x Floor Switches
8x Large Bocks
4x Stick Blocks
3x Walk Tiles
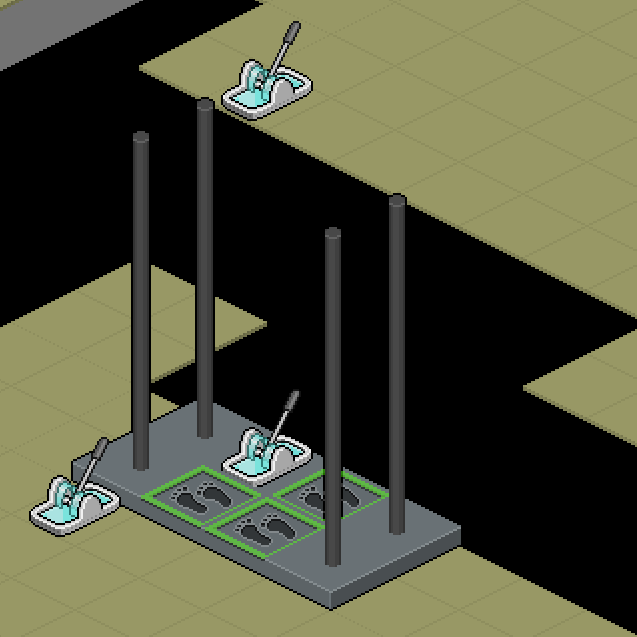
Place one floor switch on the moving platform, and place the other switches where you want players to call the elevator from.
![]() Place your wired stack in the following order:
Place your wired stack in the following order:
1. WIRED Trigger: Furni State Is Changed
2. WIRED Effect: Match Furni to Position & State
3. WIRED Effect: Match Furni to Position & State
4. WIRED Add-on: Unseen Effect
5. WIRED Add-on: Movement Physics
6. WIRED Add-on: Animation Time

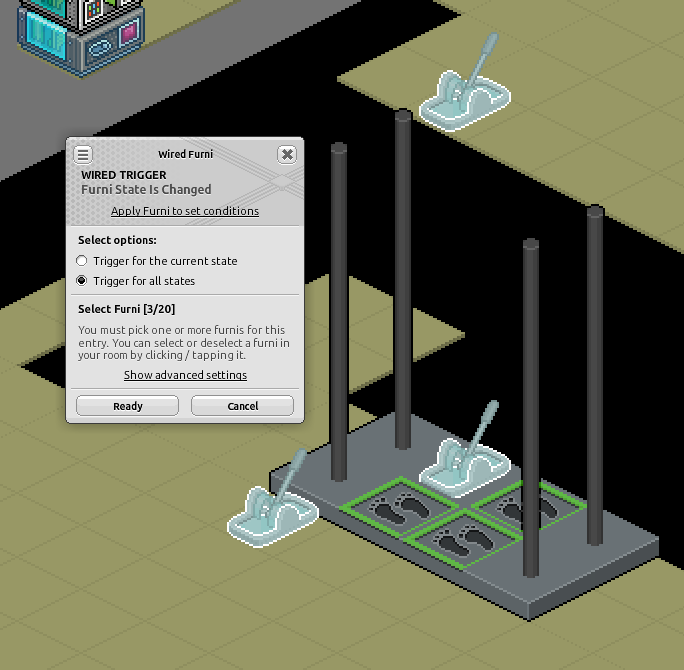
![]() Open your WIRED Trigger: Furni State is Changed.
Open your WIRED Trigger: Furni State is Changed.
Select your 3 Floor Switches.
Set the trigger option to "Trigger for all states"
Press "Ready".
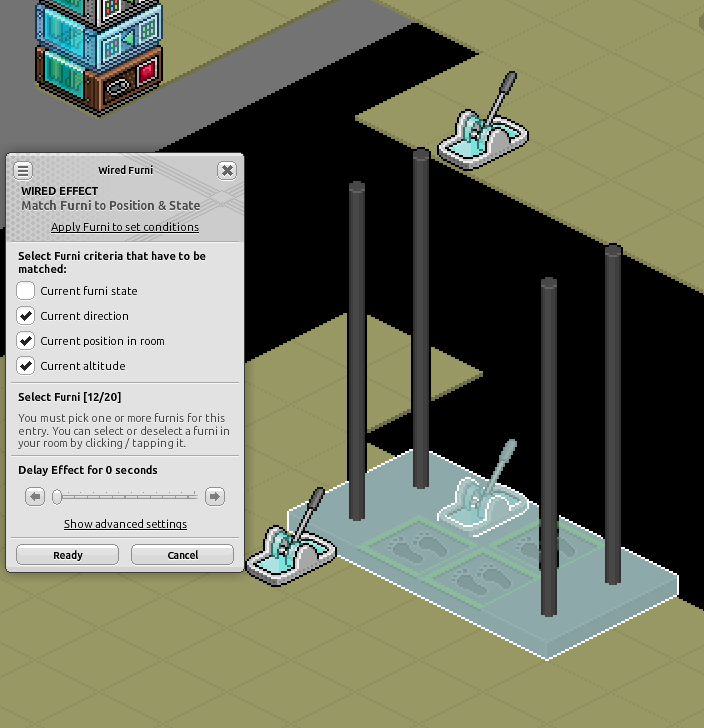
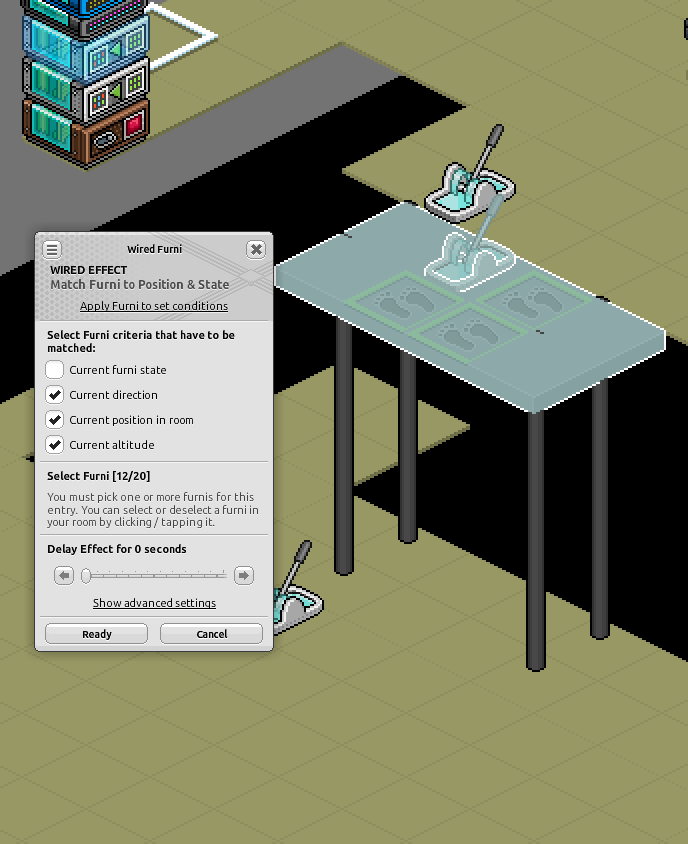
![]() Open your first WIRED Effect: Match Furni to Position & State.
Open your first WIRED Effect: Match Furni to Position & State.
Select the furni that should move with the elevator. In this example, that is the large blocks, the floor switch on those blocks and the walk tiles on the platform.
Enable the options:
• Current direction
• Current position in room
• Current altitude
Press "Ready".
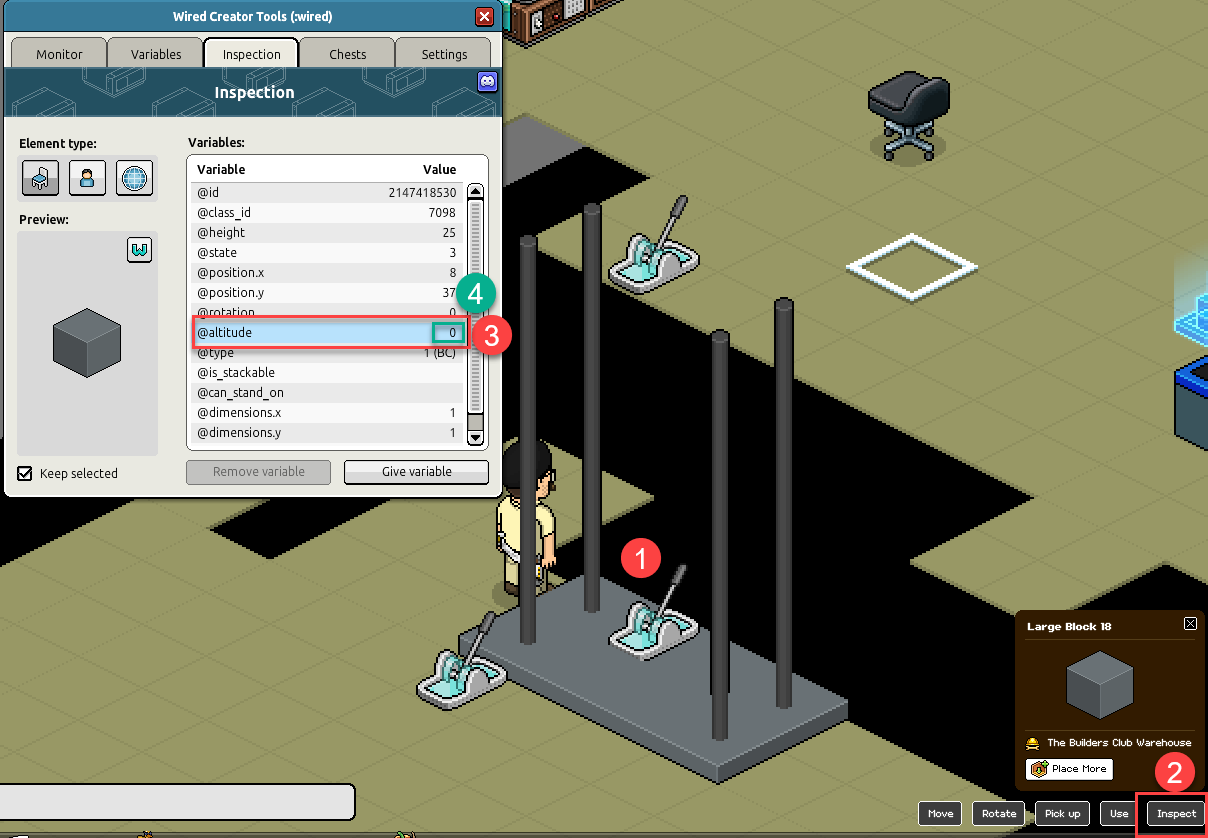
![]() Now, move your elevator platform to the height of your second floor.
Now, move your elevator platform to the height of your second floor.
To do this:
1. Click the furni you want to raise.
2. Click "Inspect.
3. Find the "@altitude" variable.
4. Change the altitude value to the desired hight by double click the number.
5. Repeat this for the large blocks, floor switch on those blocks, and the walk tiles.
![]() Open your second WIRED Effect: Match Furni to Position & State.
Open your second WIRED Effect: Match Furni to Position & State.
Select the same moving furni as Step 4
Enable the same options:
• Current direction
• Current position in room
• Current altitude
Press "Ready".
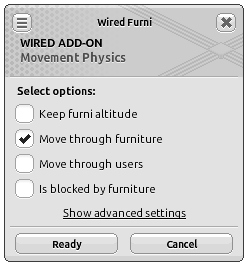
Enable "Move through furniture."
This allows the platform to move through the elevator supports/rails you placed earlier.
Press "Ready".
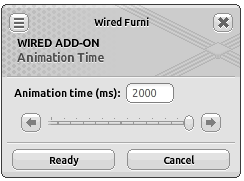
Set the animation time to your preferred speed.
For this tutorial, I am using 2000ms or 2 seconds.
You can add multiple Animation Time add-ons if you want the elevator to be even slower.
Press "Ready".
The platform, switch and walk tiles should move in unison, creating a functional elevator that you can use to change floors! Much better than stairs.
What you will need
Wired
1x WIRED Trigger: Furni State Is Changed2x WIRED Effect: Match Furni to Position & State
1x WIRED Add-on: Unseen Effect
1x WIRED Add-on: Movement Physics
1x WIRED Add-on: Movement Physics
1x WIRED Add-on: Animation Time
Building
If you wish to copy this tutorial directly, including the elevator build, you will need:3x Floor Switches
8x Large Bocks
4x Stick Blocks
3x Walk Tiles
Step 1
Build Your Elevator
In this example, the elevator uses 8x Large Blocks as the moving platform, 4x Stick Blocks as the elevator frame/rails, 3x walk tiles on the platform and 3x floor switches to call/activate the elevator. Build Your Elevator
Place one floor switch on the moving platform, and place the other switches where you want players to call the elevator from.
Step 2
Build Your Stack
Build Your Stack
1. WIRED Trigger: Furni State Is Changed
2. WIRED Effect: Match Furni to Position & State
3. WIRED Effect: Match Furni to Position & State
4. WIRED Add-on: Unseen Effect
5. WIRED Add-on: Movement Physics
6. WIRED Add-on: Animation Time
Step 3
Configure The Trigger
Configure The Trigger
Select your 3 Floor Switches.
Set the trigger option to "Trigger for all states"
Press "Ready".
Step 4
Configure Your First Effect
Configure Your First Effect
Select the furni that should move with the elevator. In this example, that is the large blocks, the floor switch on those blocks and the walk tiles on the platform.
Enable the options:
• Current direction
• Current position in room
• Current altitude
Press "Ready".
Step 5
Raise The Elevator To The Upper Floor
Raise The Elevator To The Upper Floor
To do this:
1. Click the furni you want to raise.
2. Click "Inspect.
3. Find the "@altitude" variable.
4. Change the altitude value to the desired hight by double click the number.
5. Repeat this for the large blocks, floor switch on those blocks, and the walk tiles.
Step 6
Configure Your Second Effect
Configure Your Second Effect
Select the same moving furni as Step 4
Enable the same options:
• Current direction
• Current position in room
• Current altitude
Press "Ready".
Step 7
Configure Movement Physics
OpenWIRED Add-on: Movement Physics.Configure Movement Physics
Enable "Move through furniture."
This allows the platform to move through the elevator supports/rails you placed earlier.
Press "Ready".
Step 8
Configure Animation Time
Open [b] WIRED Add-on: Animation Time.Configure Animation Time
Set the animation time to your preferred speed.
For this tutorial, I am using 2000ms or 2 seconds.
You can add multiple Animation Time add-ons if you want the elevator to be even slower.
Press "Ready".
Final Result
When any of your floor switches are used, the elevator should move between the upper and lower floor.The platform, switch and walk tiles should move in unison, creating a functional elevator that you can use to change floors! Much better than stairs.